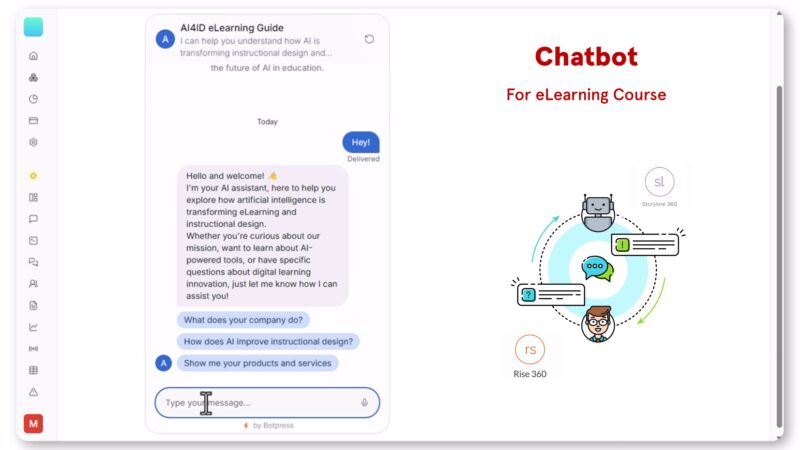
In the world of eLearning, providing immediate and accurate learner support is crucial. While general AI chatbots offer a quick solution, they often pull information from the vast and sometimes unreliable internet, leading to irrelevant or even incorrect answers. This is a major concern for instructional designers who need to ensure learning objectives are met with precision.
The good news? You can now easily integrate a custom AI chatbot directly into your eLearning courses, trained exclusively on your specific content! This ensures learners receive focused, on-topic assistance every time.
Why General Chatbots Fall Short in eLearning
Traditional AI chatbots, while impressive, pose a challenge for educational content. Imagine a learner asking a question about a specific concept in your course, only to receive an answer pulled from Wikipedia that uses different terminology or even contradicts your material. This can create confusion, disrupt the learning flow, and ultimately undermine your instructional design.
The Power of a Custom Knowledge Base Chatbot
A custom AI chatbot changes the game. By training the bot only on your course materials – be it PDFs, web pages, or internal documentation – you guarantee that every response is:
- Focused and on-topic: Learners get answers directly related to the content they are studying.
- Accurate and consistent: The chatbot reinforces your learning objectives with verified information.
- Personalized: The support feels tailored to their specific learning journey within your course.
You can even create a hybrid chatbot that combines your curated knowledge base with finely tuned AI responses, offering even greater flexibility and a more nuanced support experience.
Build Your Custom Knowledge Base Chatbot: A No-Code Guide with Botpress
Building a custom AI chatbot might sound complex, but with tools like Botpress, it’s surprisingly simple and requires no coding skills! Here’s a step-by-step guide to integrate one into your eLearning course:
Step 1: Set Up Your Botpress Account
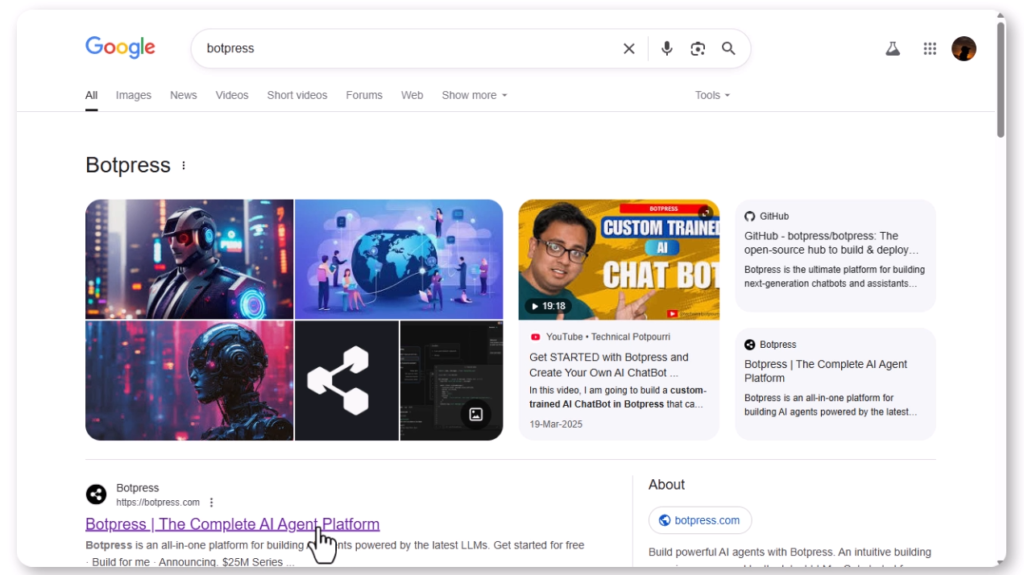
First, head over to botpress.com and either log in to your existing account or create a new one.
Step 2: Create Your New Bot
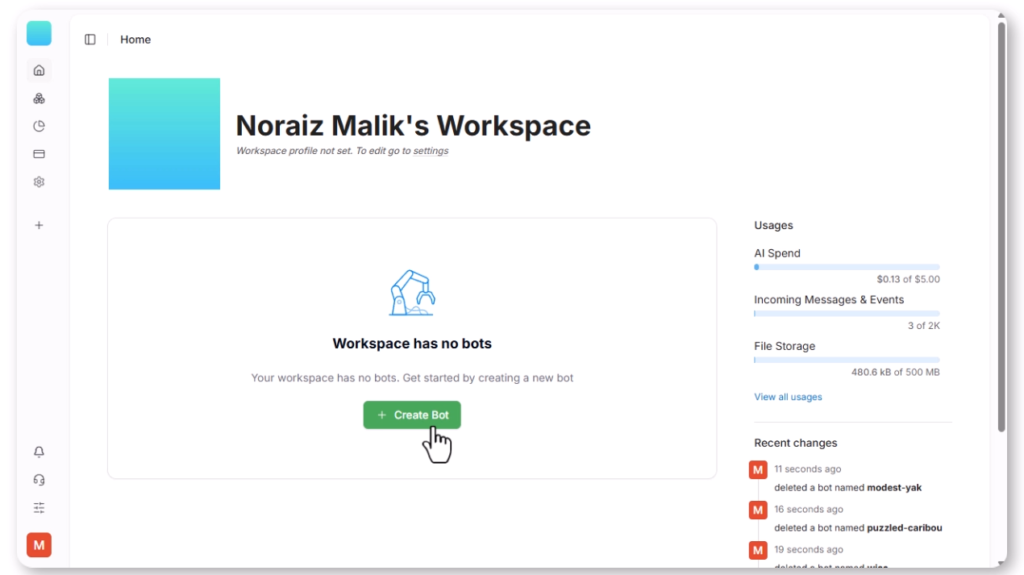
Once logged in:
- Click on “Create New Bot.”
- When prompted to choose a template, select “Other.” This option allows you to work with your own unique database of content.
Step 3: Upload Your Course Content
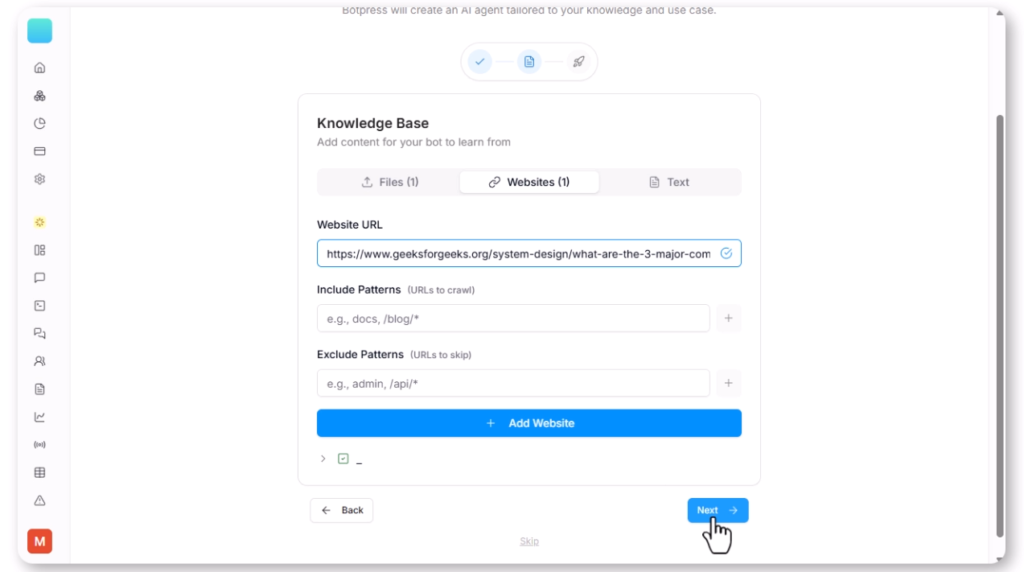
This is where your custom chatbot truly comes to life!
- Upload all your relevant course materials. Botpress supports various formats, including:
- PDFs: Your course manuals, textbooks, or supplementary readings.
- Website URLs: Links to specific pages within your course, external resources, or articles.
- Plain text: Any raw text content you wish to include.
Step 4: Create and Test Your AI Agent
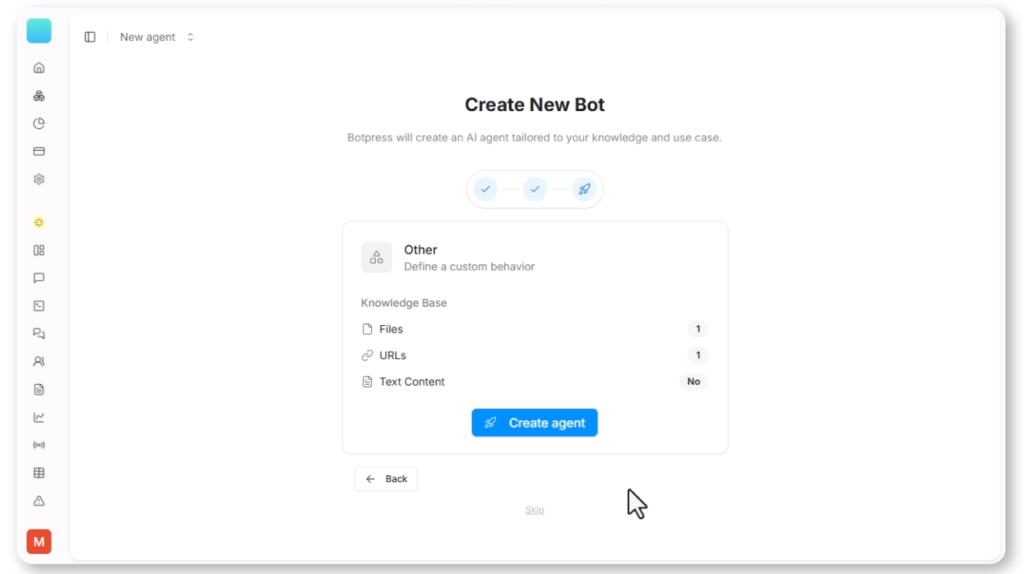
After successfully uploading your content:
- Click “Create Agent.” Botpress will now process your data and train your chatbot.
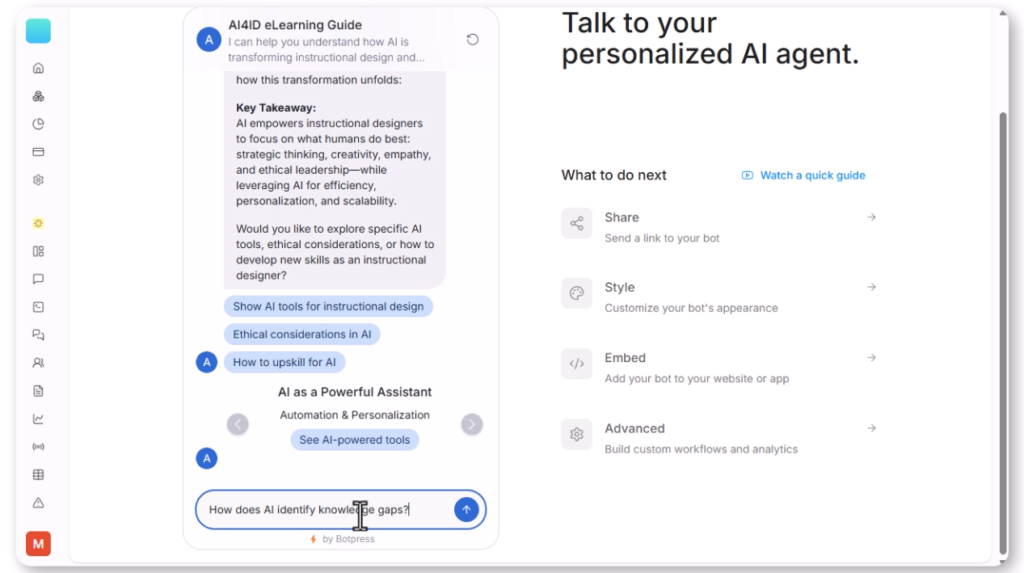
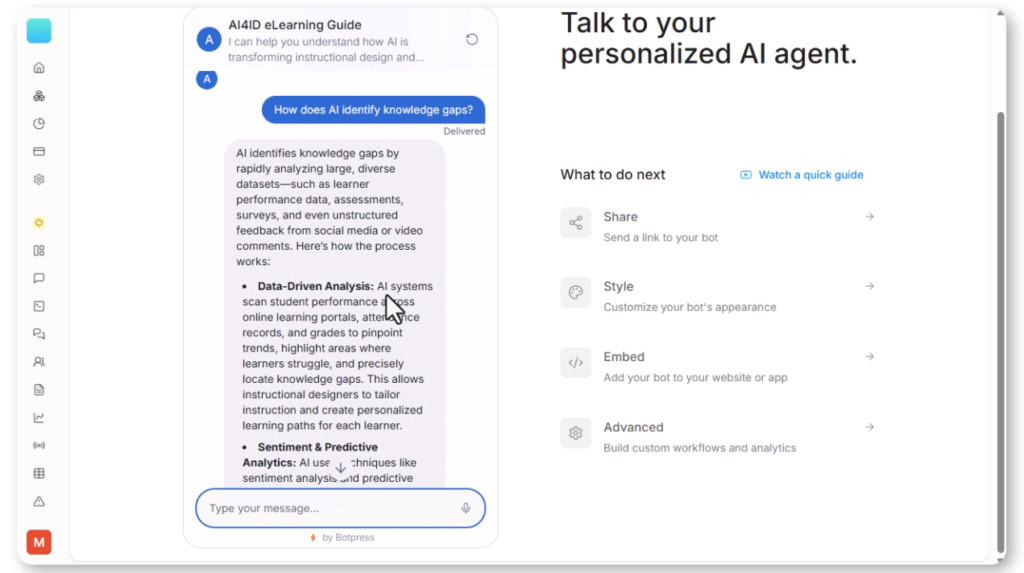
- Once created, you can test it in preview mode to see how it responds to different queries based on your uploaded content. This is a crucial step to ensure the chatbot is performing as expected.
Step 5: Get Your Embed Code
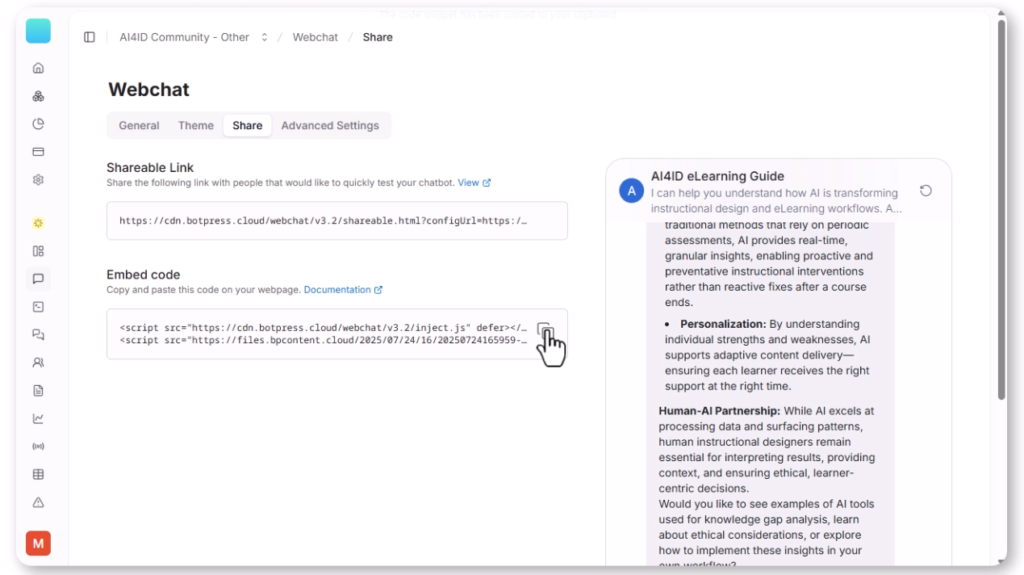
Now that your chatbot is ready, you need to embed it into your eLearning course:
- Navigate to the “Embed” tab within your Botpress dashboard.
- Copy the provided embed code. This small snippet of code is what links your course to your custom chatbot.
Step 6: Integrate into Your eLearning Course (Articulate Storyline & Rise Friendly!)
This method works seamlessly with popular eLearning authoring tools like Articulate Storyline and Rise.
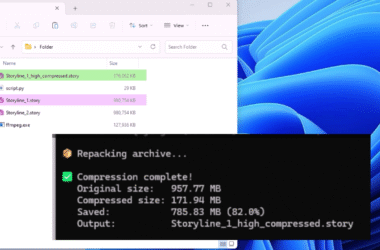
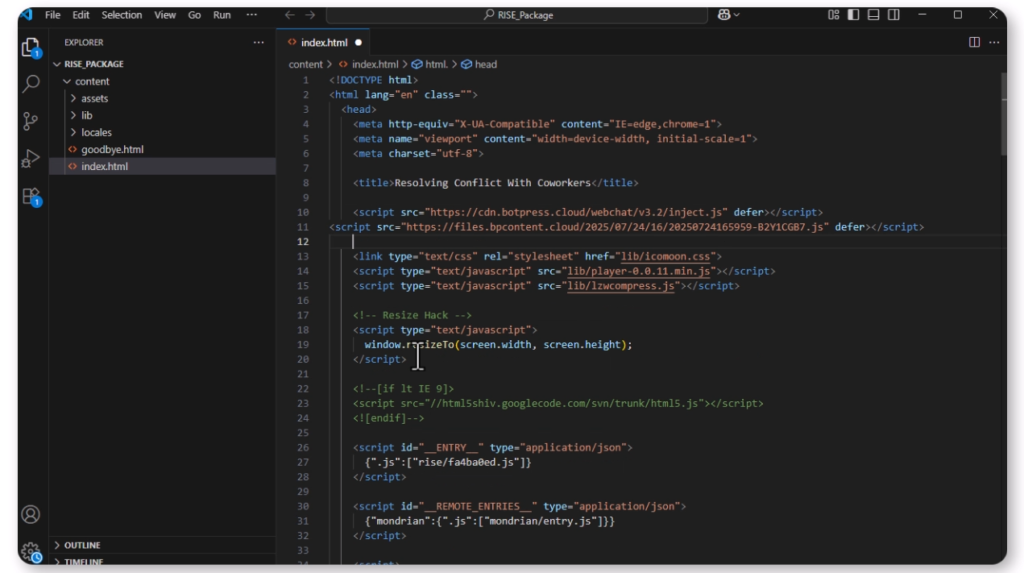
- Unzip your course package: Your published Storyline or Rise course is essentially a collection of files within a zipped folder. Unzip this package to access its contents.
- Locate your main HTML file: Inside the unzipped folder, find the primary HTML file (often named
index.htmlor similar). This is the file that launches your course in a web browser. - Paste the embed code: Open the main HTML file with a text editor (like Notepad, Sublime Text, or VS Code). Locate the
<head>section and paste the embed code you copied from Botpress just before the closing</head>tag. - Save, zip, and upload: Save the modified HTML file, re-zip your entire course package, and then upload it to your Learning Management System (LMS) as usual.
The Benefits for Your Learners and Your Courses
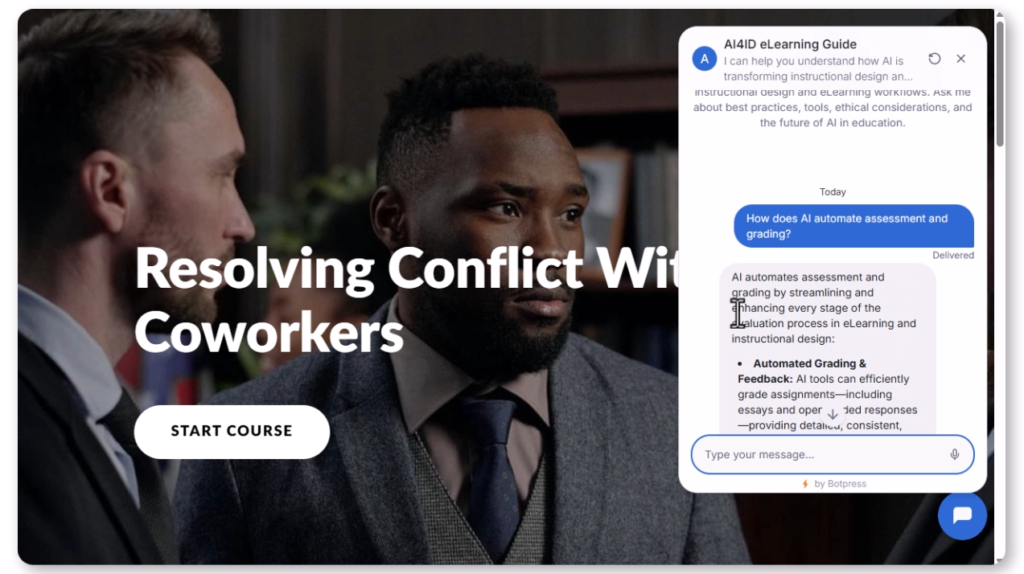
This custom setup ensures your learners get responses only from your approved course content. This provides:
- Focused, on-topic assistance: Learners receive precise answers directly relevant to their current study.
- Better alignment with learning outcomes: The chatbot reinforces key concepts and ensures consistency with your instructional goals.
- A richer and more personalized experience: Learners feel supported with immediate, accurate information, enhancing their overall engagement and success.
I’ve personally tested this integration in both Articulate Storyline and Rise, and it works flawlessly, transforming how learners interact with and receive support within their courses.