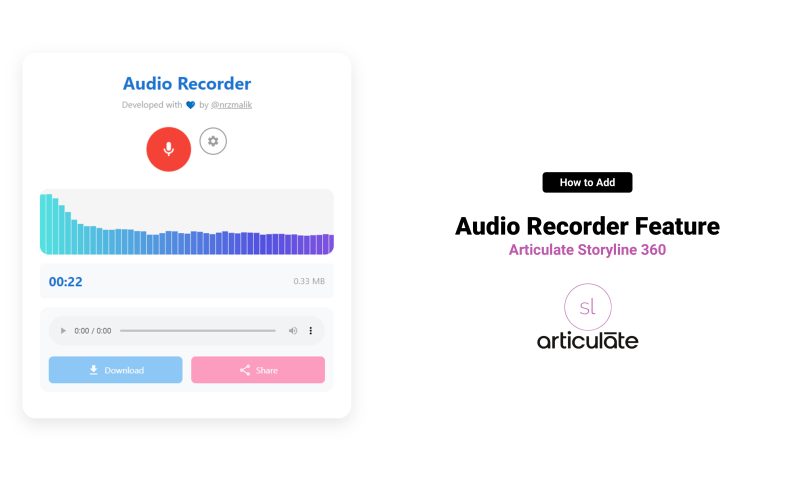
Enhance your e-learning modules by allowing learners to record, play, download, and share audio directly within your Articulate Storyline courses.
Introduction
In the ever-evolving world of e-learning, interactivity is key to engaging learners and enhancing their educational experience. One powerful way to increase engagement is by integrating an audio recorder feature into your courses. This allows learners to actively participate by recording their own audio responses, practicing pronunciation, or even submitting voice assignments directly within the course.
In this comprehensive guide, we’ll show you how to add a fully functional audio recorder to your Articulate Storyline courses. This feature is not only user-friendly but also customizable, giving learners control over audio quality and output formats.
Preview
Benefits of Adding an Audio Recorder
- Increased Engagement: Encourages active participation, keeping learners involved.
- Immediate Feedback: Learners can listen to their recordings and self-assess.
- Versatility: Useful for language learning, presentations, and vocal training.
- Convenience: Eliminates the need for external recording tools.
Prerequisites
Before we begin, make sure you have the following:
- Articulate Storyline 3, 360 (latest version recommended)
- Audio Recorder Web Object Folder (download link provided below)
Step-by-Step Guide
Step 1: Download the Audio Recorder Files

First, download the audio recorder web object files that will be embedded into your course.
🔗 Download Link: Audio Recorder Files
Step 2: Extract the Files

- After downloading, extract the contents of the ZIP file to a dedicated folder on your computer.
- Ensure all files are properly extracted and accessible.
Step 3: Open Your Storyline Project

- Launch Articulate Storyline.
- Open the project where you want to integrate the audio recorder feature.
Step 4: Insert a Web Object

- Navigate to the specific slide where the audio recorder should appear.
- Go to the “Insert” tab in the top menu.
- Click on “Web Object”.
- Insert “Web Object”.
Step 5: Configure the Web Object

- In the “Insert Web Object” dialog box, select “Folder” as the source.
- Click on the “Browse” button and navigate to the folder containing the extracted audio recorder files.
- Select the folder and click “OK”.
Step 6: Adjust the Web Object on the Slide

- Resize and position the web object placeholder on the slide to fit your design preferences.
- You can adjust the dimensions to ensure it aligns well with other slide elements.
Step 9: Publish Your Course
- Once you’ve confirmed that the audio recorder works correctly, proceed to publish your course.
- Test the published course in the intended environment to ensure full functionality.
Tips for Optimal Use
- Provide Instructions: Include on-screen guidance or tooltips to help learners understand how to use the audio recorder.
- Test Across Devices: Ensure the feature works seamlessly on various devices and browsers.
- Integrate with Assessments: Consider linking the audio recordings to quizzes or assignments for enhanced interactivity.
Conclusion
Integrating an audio recorder into your Articulate Storyline courses opens up new avenues for learner interaction and engagement. By following this guide, you can provide a richer, more immersive learning experience that caters to various educational needs.
I hope this feature will be beneficial to our e-learning development and instructional design community!


