

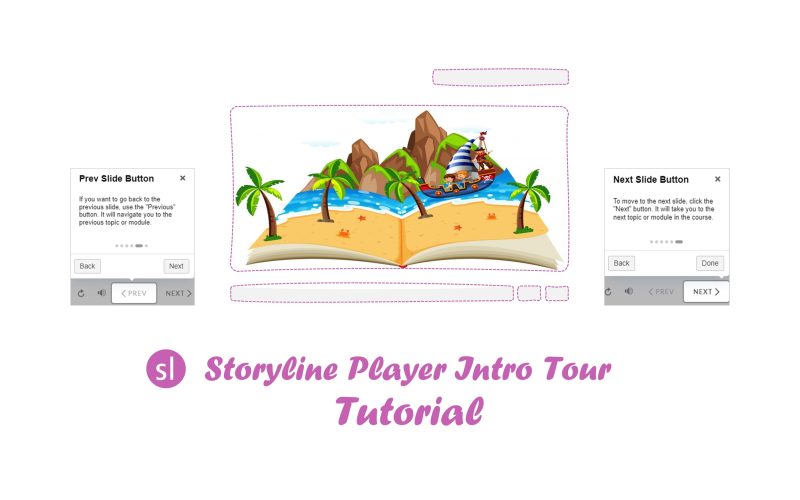
Creating seamless navigation in eLearning is crucial to delivering an optimal learning experience. Traditionally, adding navigation guides required extra slides, which often disrupted the course flow. Enter Articulate Storyline Navigation Player Intro Tour—a game-changer that integrates a tour directly into the player interface, making navigation intuitive and distraction-free.
In this post, we’ll explore the features of the Intro Tour, walk through the setup process, and share tips for customization.
Preview
Key Features of the Navigation Player Intro Tour
The Intro Tour is packed with features to enhance your eLearning courses:
- ✨ Single JavaScript Trigger: Easily set up the tour with a single script.
- ✨ Customizable Player Tours: Highlight specific navigation elements.
- ✨ Multilingual Support: Includes 10 languages for global reach.
- ✨ Enhanced UI Design: Sleek design and animations for a professional look.
- ✨ Light and Dark Themes: Choose a theme that complements your course design.
- ✨ Mobile-Friendly: Fully compatible with the Storyline mobile player.
- ✨ Extensive Customization Options: Adjust language and elements to meet your needs.
How to Set Up the Intro Tour in Articulate Storyline
Follow these simple steps to set up the Intro Tour and integrate it seamlessly into your course.
Step 1: Add the JavaScript Trigger to Slide Master

- Open Slide Master in your Articulate project.
- Create a new trigger:
- Action: Execute JavaScript
- When: Timeline Starts
- Paste the following code in the JavaScript Editor:
Note: If your project has multiple Slide Masters, repeat this step for each one.
Step 2: Trigger the Intro Tour
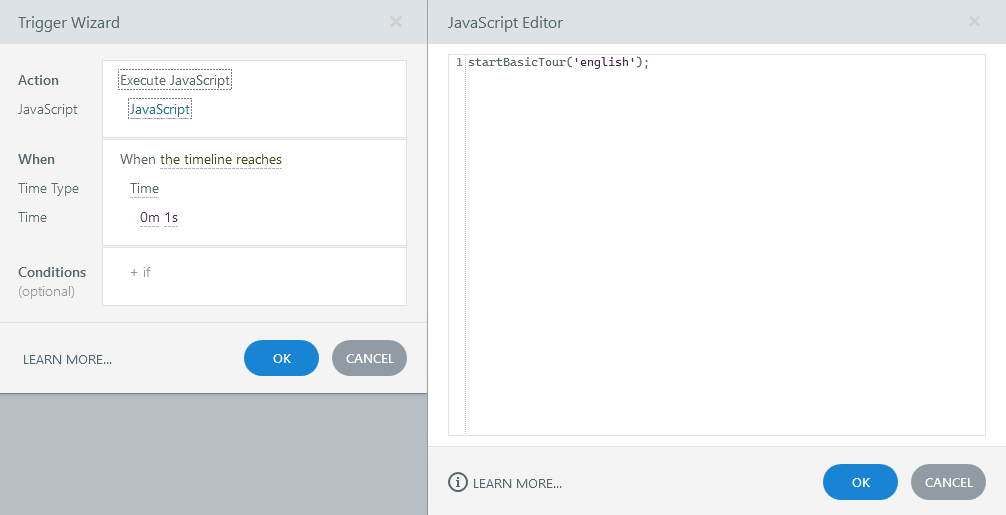
Decide where and when you want the Intro Tour to appear. Then, add a new trigger:
- Action: Execute JavaScript
- When: (e.g., On Click or Timeline Start)
- Paste the following code in the JavaScript Editor:
Customizing the Intro Tour
Storyline Player Onboarding Tour — Customization Guide
This guide details all available options, themes, languages, and custom triggers for the upgraded Storyline Intro Tour script.
Configuration Options Reference
Code Examples
1. Zero-Configuration Autopilot
Auto-detects the player elements (Classic vs. Modern), handles responsive layouts, detects the course language, and triggers the tour with zero setup.
startBasicTour();
2. Styling, Branding, & Themes
Override the default light theme with a custom brand accent and modern glassmorphism layouts:
startBasicTour({
  theme: 'glass',            // Themes: 'light', 'dark', 'glass', 'glass-dark'
  primaryColor: '#007AFF',   // Custom brand HEX color
  timeout: 5000              // Wait up to 5 seconds for player elements to load
});
3. Storyline Variable Tracking & Run-Once
Keeps tracking independent across multiple courses hosted on the same domain (e.g. LMS or localhost) and sets a completion status in Storyline:
startBasicTour({
  runOnce: true,              // Save completion status in browser LocalStorage
  storylineVar: 'tour_status', // Storyline variable to update ('completed' or 'skipped')
  theme: 'dark'
});
4. Custom Steps Order & Selector Overrides
Create a custom tour highlighting specific page elements (including custom buttons built on your slides):
startBasicTour({
  // Override the default sequence and focus only on these selectors
  steps: [
    'slide',                 // Highlight slide area
    '#my-custom-start-btn',  // Highlight custom element on the slide
    'menu',                  // Highlight player menu
    'seek',                  // Highlight seekbar
    'next'                   // Highlight navigation next button
  ]
});
5. Callback Integrations (Event Handlers)
Execute custom code or trigger slide audio/animations depending on the user’s interaction with the tour:
startBasicTour({
  onComplete: function() {
    console.log("Tour completed!");
    // Example: Play storyline audio or jump slide
  },
  onExit: function() {
    console.log("Tour skipped by user.");
    // Example: Show a helper widget icon
  }
});
6. Dynamic Language Injection
To dynamically register a new language that is not built into the script (e.g. German):
// Register German translations
addNewLanguage('de', {
  slide: 'Willkommen zum Kurs! Dies ist der Folienbereich.',
  menu: 'Das Kursmenü befindet sich hier.',
  seek: 'Verwenden Sie die Suchleiste, um im Video zu blättern.',
  titles: {
    slide: 'Folienbereich',
    menu: 'Kursmenü',
    seek: 'Suchleiste'
  }
});

// Launch the tour in German
startBasicTour('de');
Download the Source File
Ready to get started? Download the Intro Tour Source File here.
Final Thoughts
The Articulate Storyline Navigation Player Intro Tour is a powerful tool for enhancing the usability of your eLearning courses. With its easy setup, robust customization options, and mobile-friendly design, it’s a must-have for eLearning developers who want to streamline the learner experience.
Have you implemented the Intro Tour in your courses? Share your feedback or ask questions in the comments below!


Thank you for sharing this information!